
Dutch Oven Cooking Basics
I finally learned the art behind Dutch Oven cooking! (And actually a few other fun outdoor basic cooking too, which I’ll talk about over a series of blog posts.)
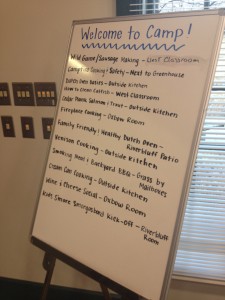
what we learned during the weekend
Earlier in April, I visited the Ponca State Park in Ponca, Nebraska for their Outdoor Cooking Weekend. For only $50, participants learned the art behind several methods of outdoor (and indoor) cooking and we ATE ALL THE TIME. One of the benefits of getting to “test” what you are learning. We also walked away with a pretty sweet swag bag with a hot mitt, outdoor cooking cookbook and more. (Did I mention this whole weekend was only $50 per person – very reasonable!)
I was most interested in finally learning how to utilize an outdoor dutch oven cast iron pot. And I was not disappointed.
Very basic tools are needed, and I DO NOT recommend skimping on quality or trying some homemade thing you saw on Pinterest.
1. A briquette lighter – this is where people get creative because they don’t want to spend $20 on this amazing tool. (One lady said she was going to use a large empty tin can. Um. No) Spend the money, you won’t be disappointed. You’ll also need paper and a lighter along with quality briquettes.

briquette lighter
2. A quality cast iron dutch oven – these are NOT purchased at any store than ends in -Mart. Visit your favorite outdoor retailer and buy either Camp Chef or Lodge brands. I know Camp Chef products come pre-seasoned and hey, anytime you can skip a step, its all good for me.
3. Long handled dutch oven hook, leather gloves and stand – the hook is for removing the extremely hot lid on your oven, the gloves are for turning the pot and lid while its cooking and the stand is for sitting your lid on once your food is done.
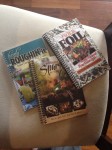 4. Your favorite camping recipe – I really enjoy the CQ Products series of books we picked up for $10 at Ponca State Park and you can find them online.
If you have none of the above tools, expect to spend anywhere from $100-120 to get outfitted.
Step 1 – Prepare your briquette lighter – time to prep: approx. 5 minutes. Time before briquettes are ready: approx. 30 minutes
Step 2 – Prepare your food in your dutch oven – our instructors used tinfoil in their ovens – not to help with cooking, but to help with ease of clean up and while you are camping, clean up is essential. Time to prep: depends on how much pre-chopping and cooking you did, but should be less than 20 min.
Step 3 – Once your briquettes in your lighter all ALL turned a nice white/gray, they are ready to use. Using tongs, spread 10-15 briquettes on the ground, sit your oven on top of the briquettes, then spread another 10-15 briquettes on the lid.
How many briquettes to use depends on the following:
the size of your pot
the temp your recipe calls for
the temp outside (is it windy, rainy, cooler?)
If your recipe calls for a 350 degree oven and you have a 12 inch oven, then the formula is the size of the pot plus 3 briquettes for the top and the size of the oven minus 3 briquettes on the bottom. Here’s a great little tool to help.
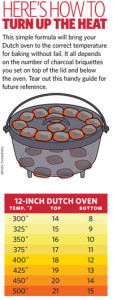
Found at ScoutingMagazine.org
Step 4 – You wait. Check yourself from lifting the lid and checking your yumminess too many times – you will lose heat and therefore, time. Its just like a regular oven at home, except you don’t have a window to see the product cook.
Step 5 – Check your briquettes. If it is windy and otherwise crappy like it was for us in Ponca (I mean, its April in Nebraska, not exactly Pasadena) we would add more briquettes as time went on as the wind really “sucks” the heat from them.
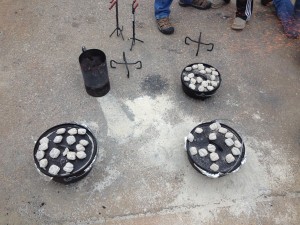
We had several going at the same time
And because you are going to be all up in Pinterest looking for cool Dutch Oven Recipes, I did the work for you:
http://www.pinterest.com/campchefmfr/dutch-oven-recipes/
http://www.pinterest.com/cowgirly249/camping-and-dutch-oven-recipes/
http://www.pinterest.com/rocknrodadmin/food-dutch-oven-cooking-recipes/
http://www.pinterest.com/conniesmith1/dutch-oven-delish/
http://www.pinterest.com/iowadnr/dutch-oven-recipes/
[…] my last post, I talked about Dutch Oven Cooking basics I learned while at Ponca State Park cooking weekend in Ponca, Neb. I also learned a very […]